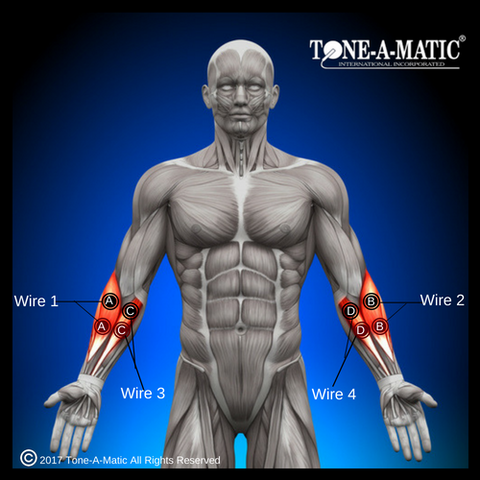
Electrode Placement for Electric Stimulation Charts
EMS Electrode Pad Placement Charts
The diagrams below can be used as a guide to demonstrate where to place pads on different muscle groups during your EMS treatment. Please Note: consult your physician / healthcare professional before using an Electric Muscle Stimulator.
Before you Start
- Always check the electrode gel for tac prior to use. Gently touch the gel surface with a fingertip. If the gel does not easily adhere and are dried out, you can either:
- Run your finger under the tap and rub your wet finger over the gel surface of the pad. This may extend usage.
- Use our TAMEXX Pad Prolonger Gel. This unique formula was created to bring life back into your dried out pads and extend their lifespan.
- Purchase new adhesive electrodes.
How to Place the Electrodes
- Connect the electrodes to the lead wires that come with your machine
- When using Self-Adhesive Electrodes (Sticky Pads): simply place the pads on your skin
- If you are using Carbon Flex Electrodes (Rubber Pads): Wet the side of the pad that will be touching your skin and secure the pads with Velcro straps.
Where to Place the Electrodes
- Choose the muscle group(s) you want to treat
- Each wire has 2 leads: Positive (Red) and Negative (Black)
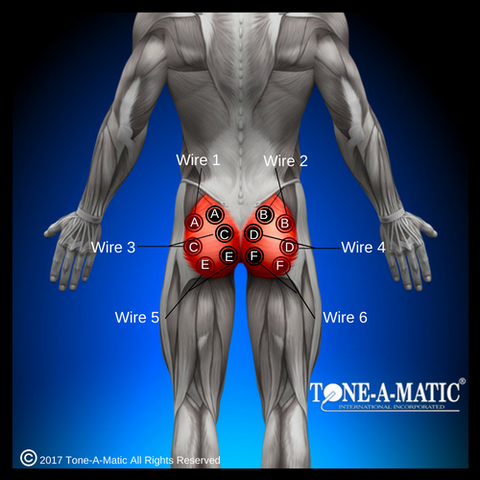
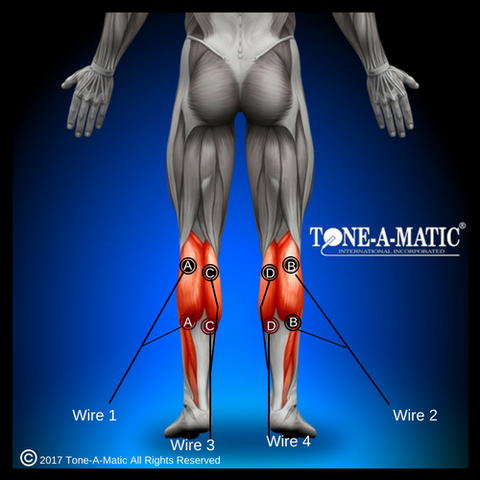
- Correspond the pad placement to the letters that are shown in the appropriate guide(s) below.
As illustrated in the diagrams, each wire would connect to the same letter in red and black.
Example: Wire/Channel 1 = “A” Red and “A” Black
ABDOMINALS
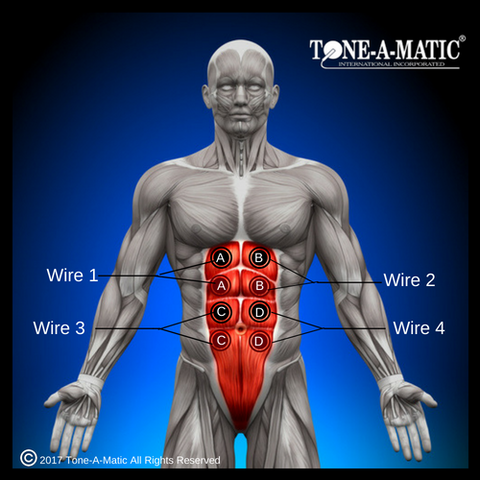
OBLIQUES
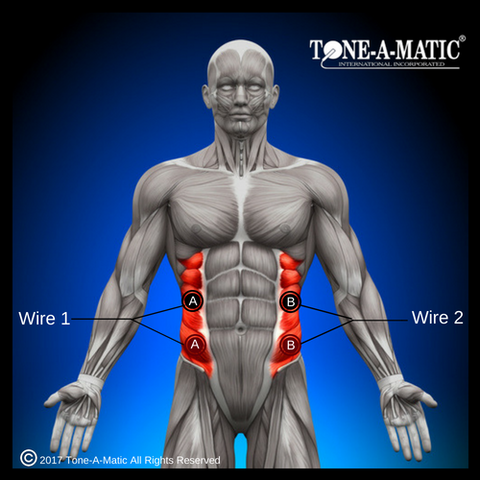
TRAPEZIUS
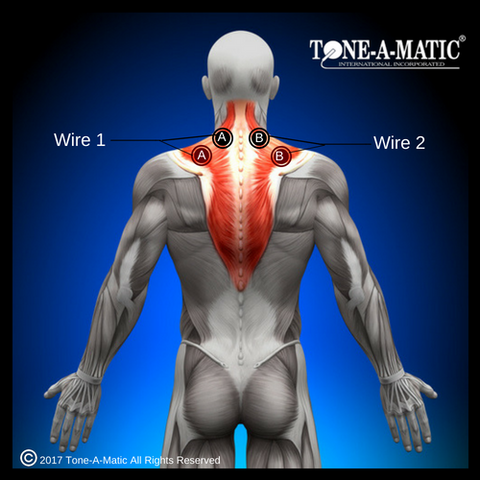
LATISSIMUS DORSI
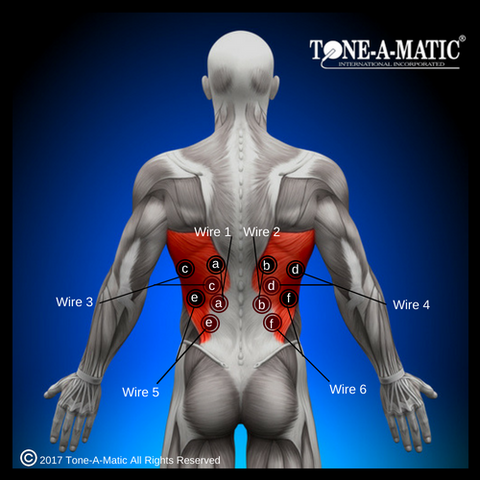
BICEPS
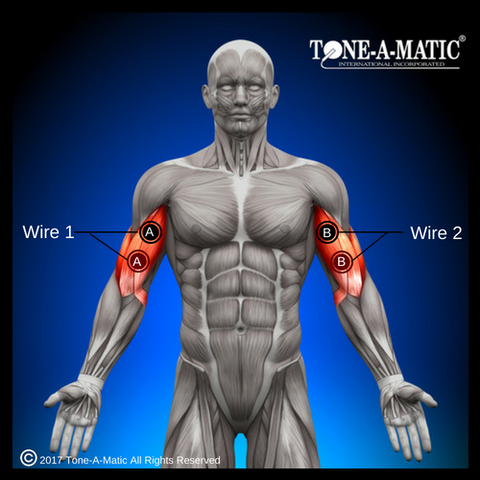
TRICEPS
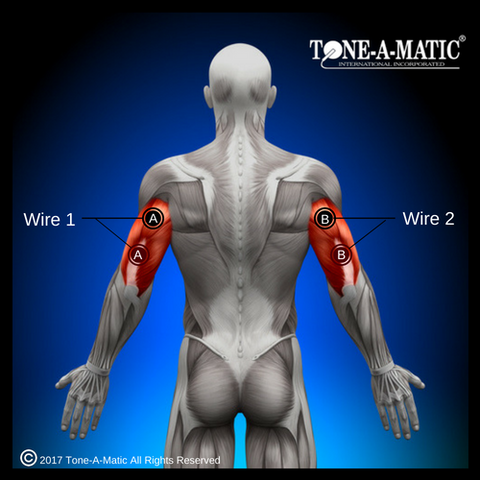
FRONT DELTOIDS
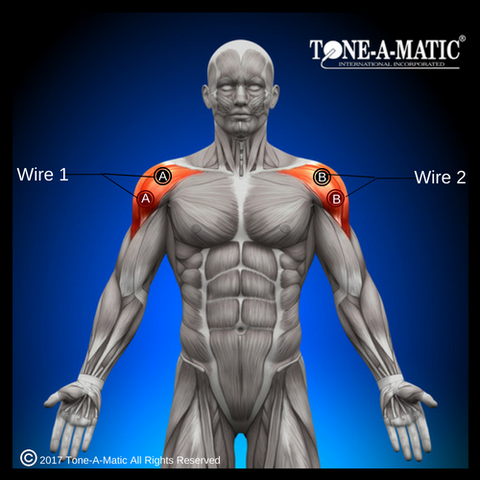
REAR DELTOIDS
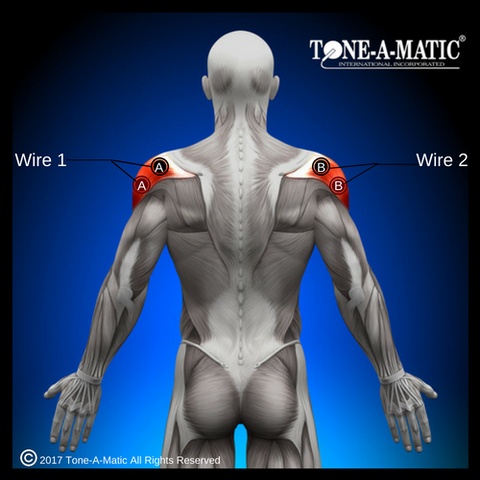
VASTUS MEDIALIS
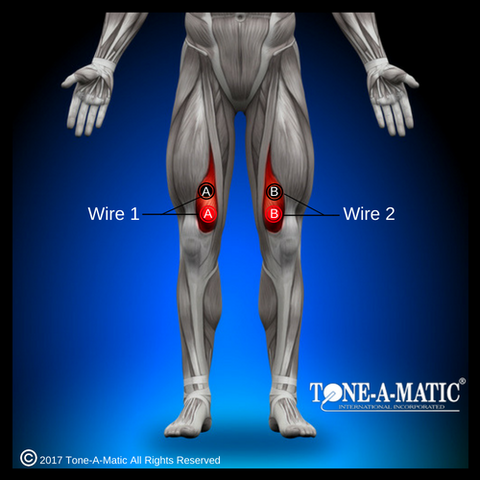
VASTUS LATERALIS
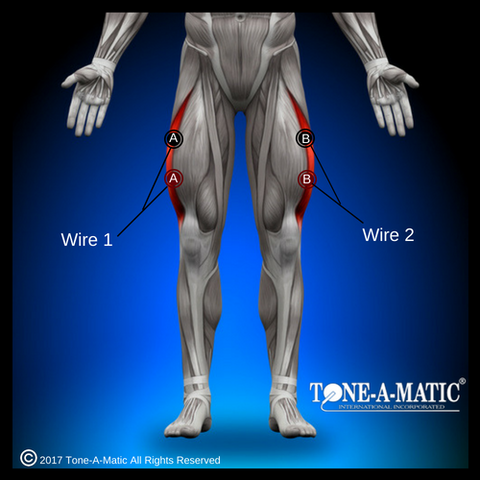
QUADRICEPS & GRACILIS
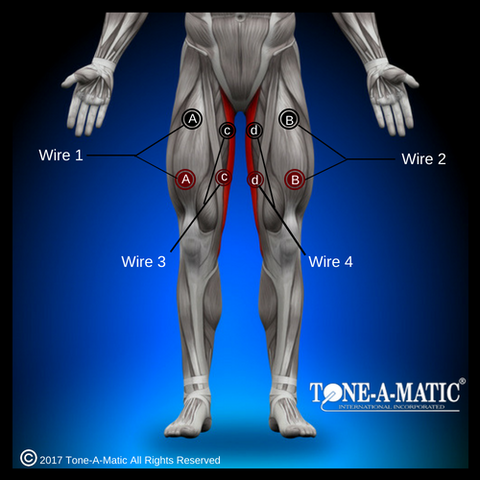
HAMSTRINGS

GLUTEUS MAXIMUS
CALVES
FOREARMS
